Turbo - Oil Drain Fabrication
A few tricks of the trade explained!!
What is a turbo oil drain??
The turbo oil drain is a pipe that connects your turbo chargers oil gallery to the engine, this drains the oil away from the bearings inside the turbo charger.
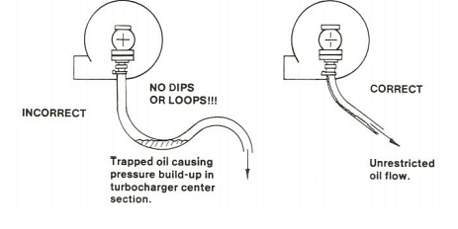
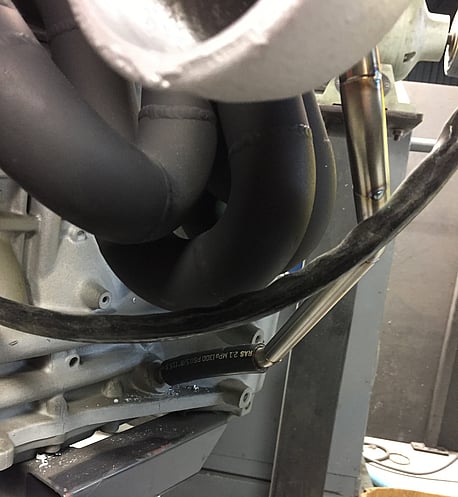
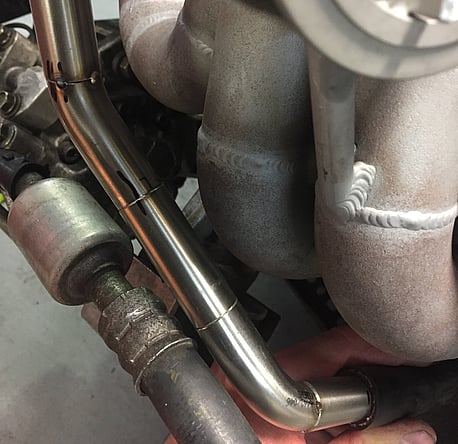
The pipe is connected typically to the sump or the lower portion of the engine block. It is important for the oil drain pipe size to be large enough to drain enough volume of oil away quick enough. The oil drains away from the turbo by gravity only there is no pressure on the drain side of the turbo. It is also important for the return line not to have any dips or loops in it so the oil does not pool inside the drain like in the picture below.
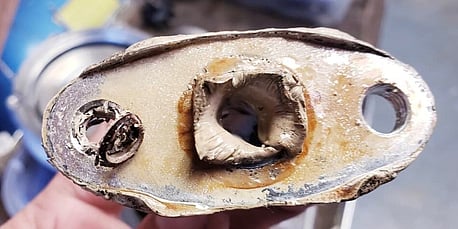
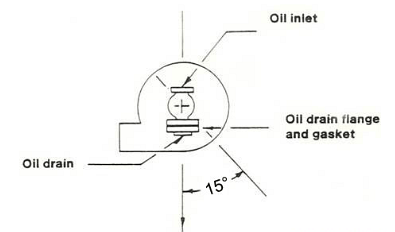
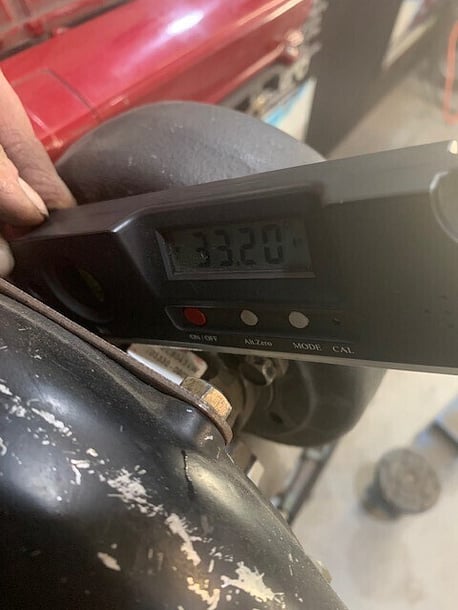
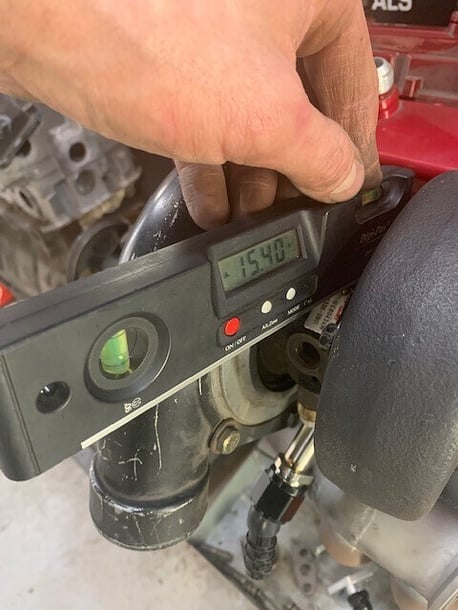
Another important factor of setting up an oil drain on an aftermarket turbo setup is to not rotate the center oil gallery of the turbo more than 15 degrees, if this angle is to great the oil will not drain away correctly and will puddle, this can cause the oil to bypass the seals into the housings themselves. Smoking issues can occur if the oil enters your exhaust housing.
It is recommended that at least a 13mm inside diameter line is used for the oil drain. If your turbo has a large oil feed line with no oil restrictor then there will be more oil volume passing through so a larger line would be required.
Understanding Oil Drains....
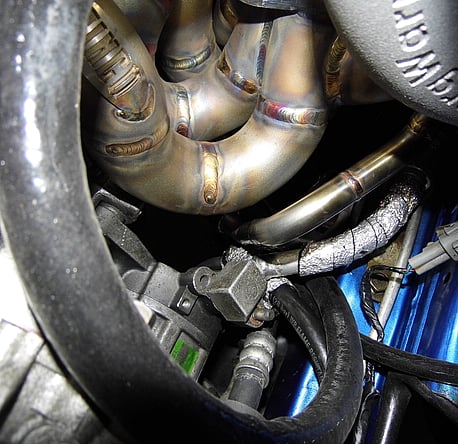
Heat is a major issue with turbo oil drains, when the oil drain runs to close to a major heat source i.e when the turbo is top mounted the drain will run close to the runners of the manifold or if low mounted then the drain can be close to the turbine housing.
When using braided line (even though the braid on the exterior of the line is stainless steel) it still has rubber or teflon on the inside and if this gets hot enough it will melt. By running a solid line made from generally stainless steel this eliminates the issue of it melting. Fabricating a solid line does have its challenges though, it will take longer to make up and are more prone to cracking if not made strong enough or to much tension is on the line from mis-alignment. It is important that the line isn't under any tension when the -an fittings or rubber hose is connected to it.
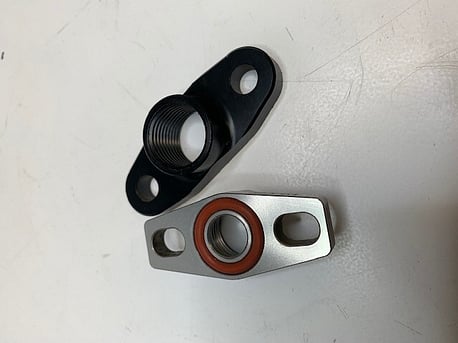
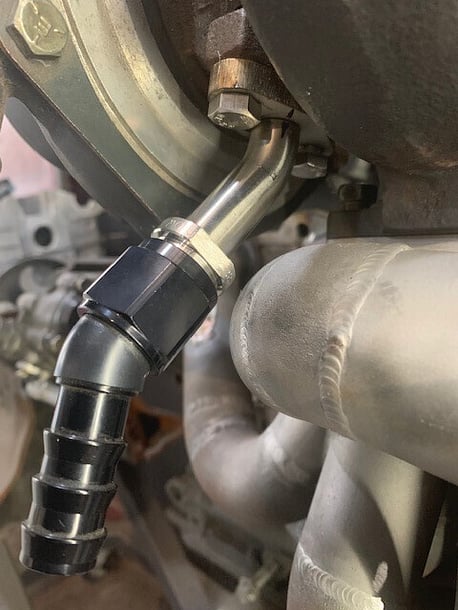
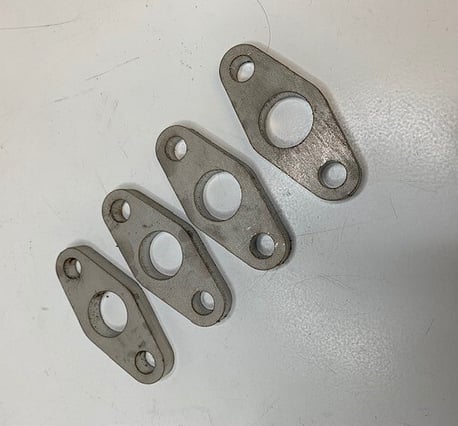
The problem we see the most are the fittings available for oil drains that are an "off the shelf" item. Pictures below show a flange with a thread. These are designed for a 1/2" or 3/4" fitting to be fitted to it. In a ideal world they work great with heaps of room everywhere etc etc, but no that is not reality all the time. These types of flanges can have two main issues:
1. Say the thread is 1/2" but this is a od (outside) measurement of the thread so the actual id of the hole can be reduced down (depending on what brand of adapter you are using), so it pays to check the inside diameter size. Sometimes this can be drilled out to a bigger diameter (you will need to make sure there is enough thickness on the fitting to drill it out)
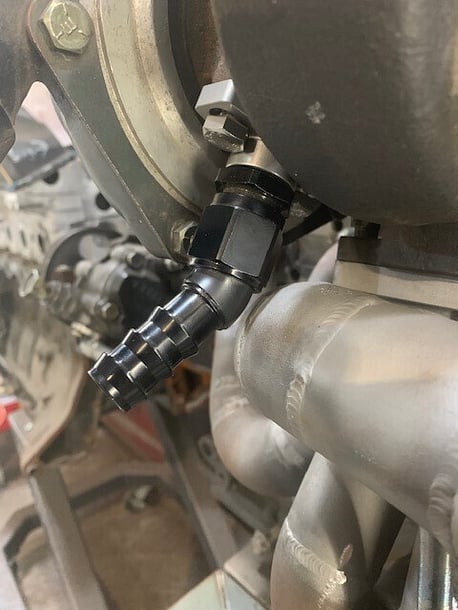
2. When you thread an adapter into the threaded flange it becomes very long, then add a -10 45 degree fitting onto that while still trying to get clearance to access it with a spanner and you will have a big issue with the angle of the center housing of the turbo. (you want to try and keep the angle of the oil housing within 15 degrees)
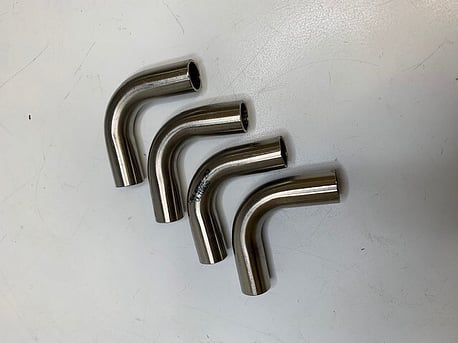
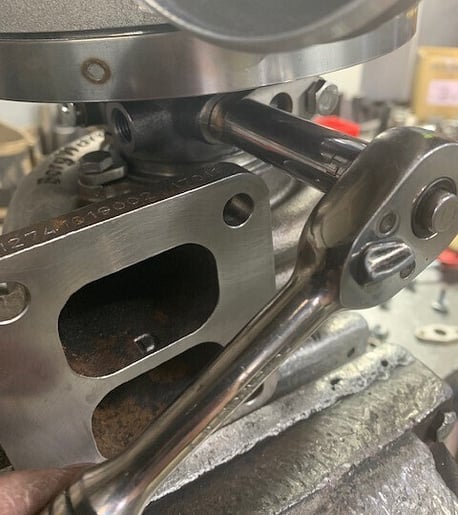
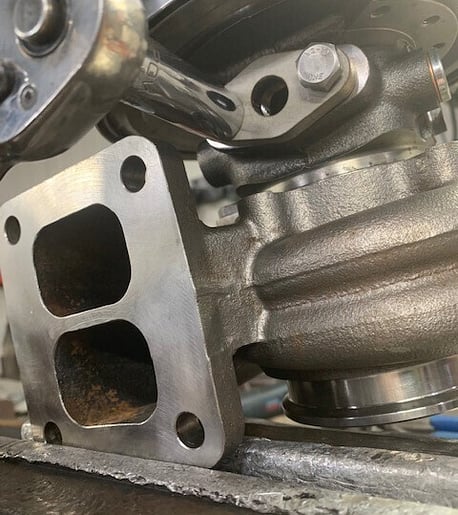
Another challenge with the -an fittings is that there are limited angles available i.e 30,60,90 degree but a lot of the time you may need 17 degrees (for argument sake). So this is where using the tube elbows can be an advantage.
These next pictures will show you the angle difference that the tube elbows can make over the threaded adapters when setting up the angle of the drain on the turbo.
Where to start??
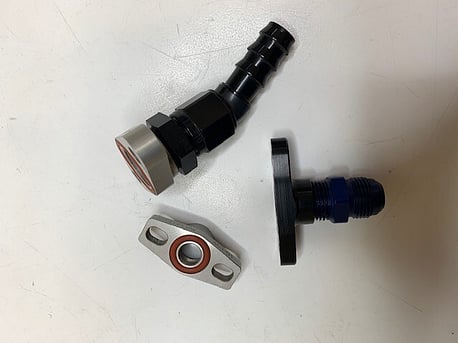
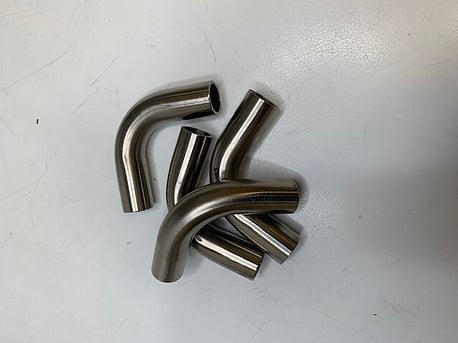
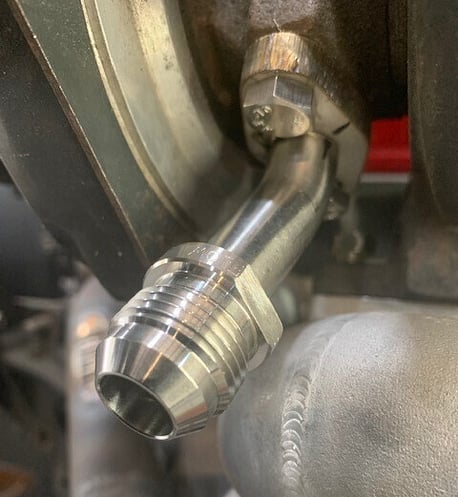
These tube bends are ideal to fabricate oil drains and come in a large variety of sizes, When fabricating the oil drain you can either run the solid tube the whole length of the oil drain and then attach the remainder with some oil resistant rubber hose, or you can just do a small starter section and add a -an weld on fitting to the end like the photos below.
Using the starter section allows you to still use a braided line but keeps the bulky fitting clear of the turbo or manifold runners so you can access it with a spanner.
A few tips to get a good head start!!
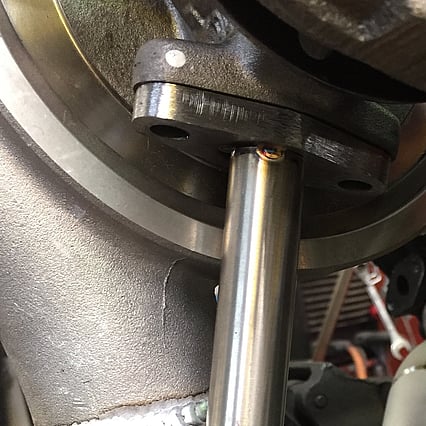
- This first tip is a simple one but good one, the center oil gallery that is attached to the turbine housing (rear housing) has a series of bolts that hold it in place. Loosen these and you can turn the center housing to orientate it. You can leave these all loose, we usually just nip the top bolt up (so you can access it with a spanner easily) you want to have at least one bolt nipped up so the housing can't turn freely when taking the drain off and on. By leaving this loose you have the advantage of getting that little bit more or less of an angle once the solid line is tacked up (or once welded), but remember to try and keep the angle within the recommended 15 degrees.
- When setting up the drain start by bolting up the flange to the oil drain section of the turbo. Cut the elbows to the desired angle to clear all the main heat areas. You can mark the position of each bend by adding a line mark from a vivid.
- If the drain line is long then sometimes it does pay to weld it up in sections if there isn't much room between pipes and other parts around the manifold. This can limit how much the line pulls while welding and then you can do the final alignment of the sections and complete the final welds.
- Another great way to tighten and loosen your drain fitting without putting to much strain on the drain itself is to grind x2 flat faces on the weld on section of the fitting, this way you can use an adjustable spanner to hold it firmly.


- Always try to have the bolts for the oil drain flange clear of the turbo flange so you can access them with a socket or spanner. This will also ensure that the bolts or studs for the turbo flange can be accessed and tightened without the drain getting in the way.
Want to learn more on turbo installation?? Click the link below for Turbo Bracing